

Since the SIM Card Registration Law (RA 11934) has been signed into law and just waiting for the Implementing Rules & Regulations (IRR) to be published before it can finally be implemented in the Philippines, I thought of documenting how I registered for a Tourist SIM Card on my latest travel to Singapore (my nth time to the Lion City this year).
I made a quick trip to a convenience store near our hotel to purchase a SIM (Subscriber Identity Module) Card. When traveling to Singapore, I normally buy an M1 SIM Card if Singtel is not available. For this trip, I got an M1 SIM Card that costs S$12 and comes with 100GB of data.
By default, Tourist SIM Cards in Singapore are sold inactivated — similar to what is written in the Philippines’ RA 11934 that Prepaid SIM Cards will be sold to end-users not yet activated.
When you purchase a Tourist (prepaid) SIM Card at the Singapore Changi Airport, the salesperson can assist you in activating your number (they will scan your passport and insert the SIM Card into your device), though, you may also opt to do it by yourself.
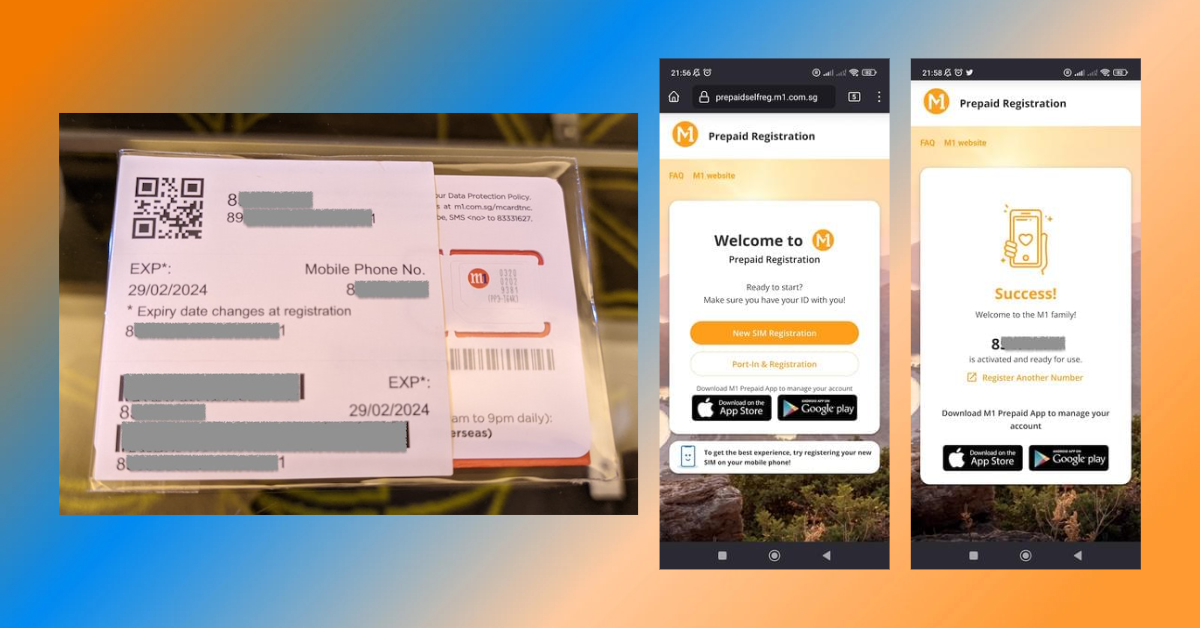
Since I got my M1 SIM card from a convenience store, I will have to do the activation myself. Together with the SIM Card package is a piece of paper with instructions on how to Self Register the M1 SIM card.


Based on the instructions, I have to go to the M1 Prepaid Registration website [https://prepaidselfreg.m1.com.sg] to have my Tourist SIM Card activated.

I was asked if I wish to port-in my existing non-M1 Prepaid Number. I continued the registration process without porting-in.

The registration proper starts with selecting an ID type (Passport for me since I am a tourist) as well as my nationality.

The website (which I am accessing using Firefox mobile on my smartphone) then asked me to prepare the data page of my passport for scanning using my device’s built-in camera.

The website will then display the data scanned from your passport for you to check and confirm.

The next step is for you to scan the SIM Card package barcode. The website will ask you to confirm if the data matches with the ones printed in your SIM Card package.

The website will once again ask you to confirm the data inputted before proceeding with the registration.

And that’s it! Your Singapore Tourist SIM Card is activated.

I personally feel that my experience in registering my Singapore Tourist SIM Card will somewhat be similar to what we will have in the Philippines soon. Remember, according to the SIM Card Registration Law, it will be the telcos who will need to devise a way to register the SIM Cards. The only burden that the telcos will need to bear is how they can authenticate the multitude of ID cards that Filipino mobile users will use to register their SIM Cards since most do not have their Philippine Identification System (PhilSys) yet.
